HDR Photography with Photoshop CS5 | Only Photoshop
Photographic Processing HDR with Photoshop CS5
Tutorial por Francisco Delgado
In this tutorial we will learn how to use the new tools to handle HDR images in Photoshop CS5, which has improved significantly and there will be no need for external programs, with patience and some practice, you can create fabulous HDR images in Photoshop CS5.
Photoshop CS5 fixes several needs expressed by its users in the last editions, in the case of photographers one of those needs was the adequate management of HDR pictures (High Dynamic Range). In this tutorial we will explain the new HDR options of Photoshop CS5.
With Photoshop CS5 comes covered the desire of many photographers, who repeatedly complained of the poor options for proper management HDR images (High Dynamic Range), many saw the need to acquire external programs like Photomatrix, which has a greater power than earlier versions of photoshop.
In this new version CS5 we find gladly, new tools to handle HDR images has improved significantly and there will be no need for external programs, with patience and some practice, you can create fabulous HDR images in Photoshop CS5.
Better yet is that with Photoshop CS5 now is possible to create HDR images using just one image, is not necessary to have multiple images with multiple exposures to achieve that end.
Lets remember that the original function of the HDR is adequately reproduce dark and bright areas of an image, but since a few years the HDR is not anymore the only way to achieve a good lighting, but has become an final purpose that the effect itself has become the ultimate goal of photo editing, which continually see pictures with HDR effects really exaggerated, and although for many of us seem inappropriate, for others it is just your final goal.
Next we will see a pair of examples with a single picture, in the first we use the HDR effect for a better management of the lights and shadows, and the second that we will use is for create an exaggerated effect of HDR that looks very intense, but it is look good.
1. Improving shadows and light to regain sharpness in a photograph
Lets open the image we will use, in this case is a beautiful landscape taken from http://www.sxc.hu/photo/1221762
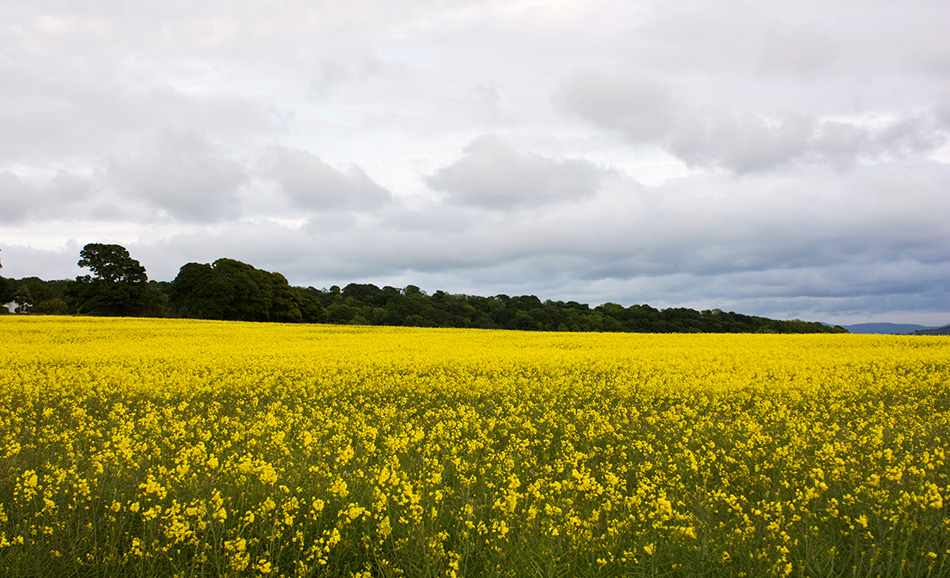
We see that the image, despite being very beautiful as it is now, it looks rather low contrasted in the clouds, in addition in the flowers and especially the stems and leaves, we see a dominant color which does not allow adequate contrast and, last but not least, we clearly see a shortage of detail in the tree line, which looks very dark and almost no distinction between the trees.
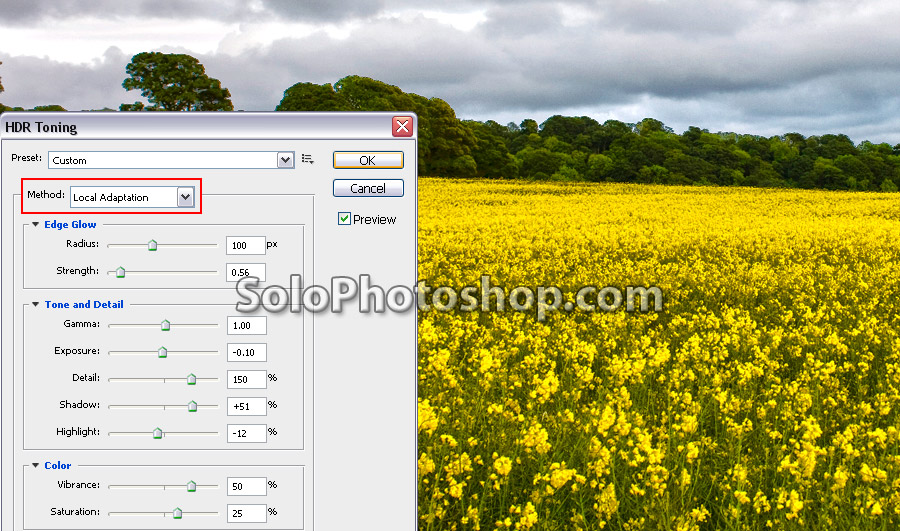
Open the new option "HDR toning", this is reached from "Image > Adjustments > HDR toning". Remember, it is only available in Photoshop CS5.
In this case we will use specifically the method "Local Adaption" because it is the one that provides more flexibility and better results. Then we see 4 blocks with options that can be edited, such as: "Edge Glow", "Tone and Detail", "Color and Toning Curve" and "Histogram", this last one is not me it seemed appropriate to use, the others options are enough.
The first option we should edit in each image is the detail, which allows us to sharpen or blur the picture. In my case, I always start testing from 150 to 300% and according to how the image looks, adjust the proportion. In this particular image the value of 150 seemed fair. Now it is convenient move the Shadow and Highlight options. If we increase the value of "Shadow", we will gradually clarifying the shadows. For this example the value of +51% seemed ideal. For the "Highlight" we increase the intensity of the lights, so decrease a little up to -12, to retrieve the details in the most illuminated zones of the image.
After that, I have lowered a little "Exposure" to lower overall image lighting, a value of -. 10 is adequate. In the case of "Saturation", default starts with a value of +20, so I have to increase only slightly to +25% and to 50% the "Intensity".
One of the most important values is the Edge Glow (glow of the border) because it generates the light, classic in the HDR, which arises from the edges of the different forms of a photograph. In this value we should experiment much more than others, especially for the second example we will see, because an important part of the appearance of the image is due to this effect. In this case, after many changes, I left a value of 10 px on radio and .56 in intensity.
In the next picture we see all the values:
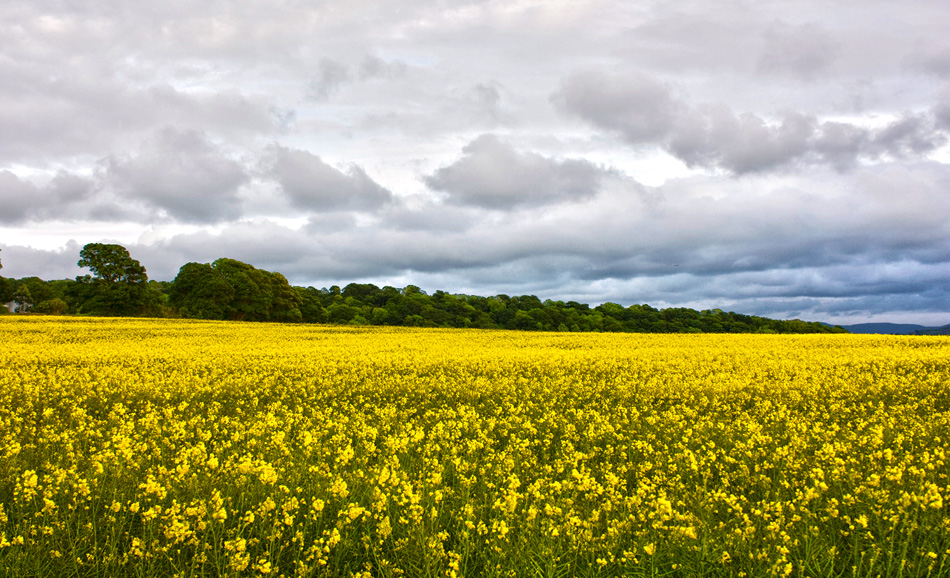
And ready, this is our final result, which compared to the original we see a dramatic improvement.
2. Intense HDR Effect
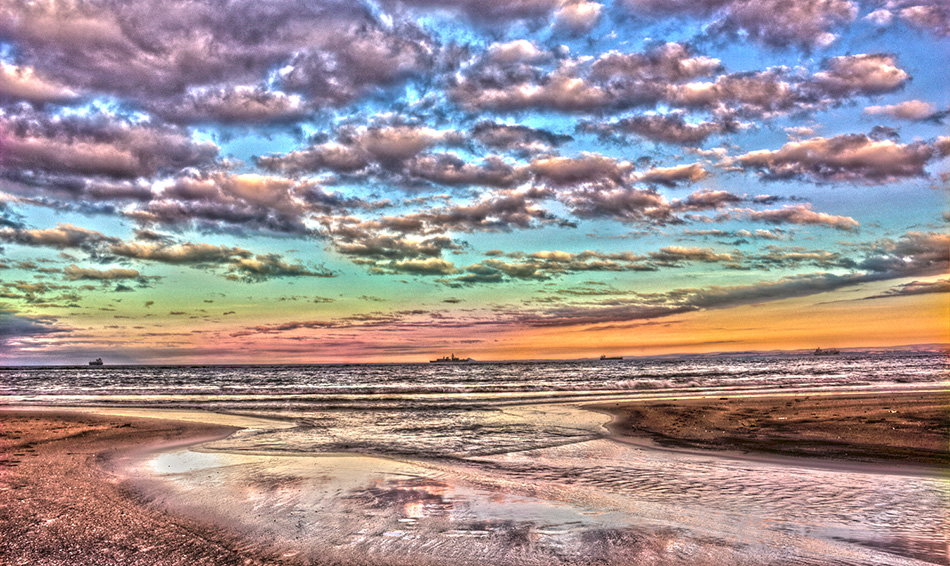
Well now lets see an exaggerated HDR effect so that we can obtain a picture that looks much more intense than the original. This is the beautiful picture that was taken from http://www.sxc.hu/photo/1238390 a beautiful and very quiet evening on any beach of the planet.

The goal is to intensify the shadows and highlights, as well as increase excessively, the sharpness of the image, but being careful not to underexpose or overexpose important landscape areas. After a few minutes testing I found the following options as the most suitable combination of what I want:
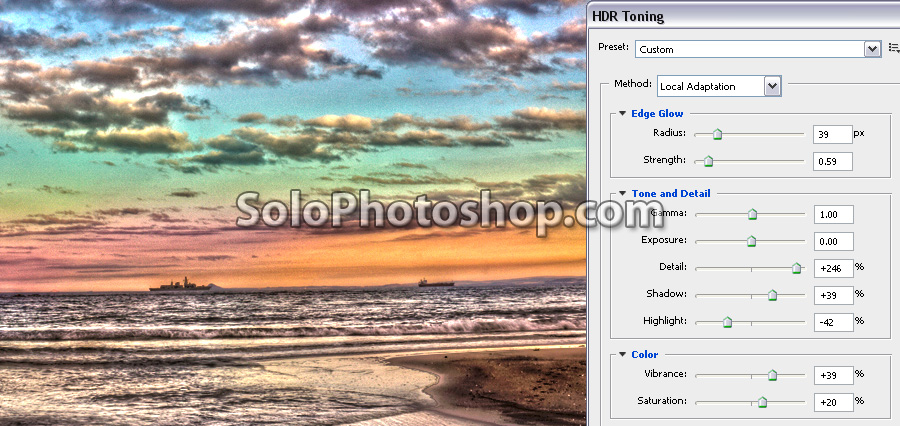
And this is our final image:
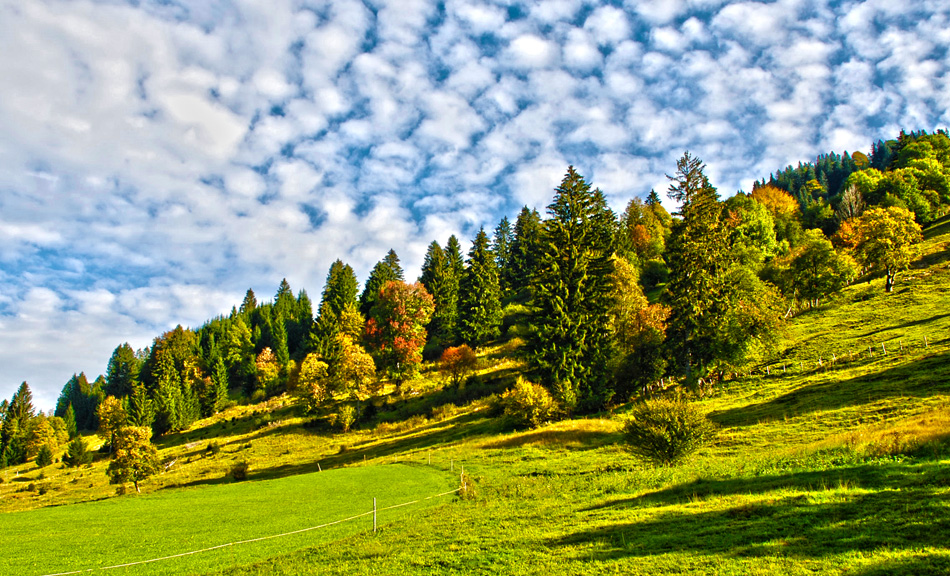
An additional result:
Hope you like it. See you at the next Photoshop CS5 tutorial.


Comentarios de HDR Photography with Photoshop CS5 | Only Photoshop
↑ Tutorial