Rag Skin using Adobe Photoshop | Only Photoshop
Photo Effects Tutorial
Tutorial por Tigerazzo
In this Tutorial Tigerazzo will show us how to make a Rag Skin on your Photos using Adobe Photoshop.
Applying Textures in Photoshop.
1- We will begin with 2 layers: of the image and the texture.
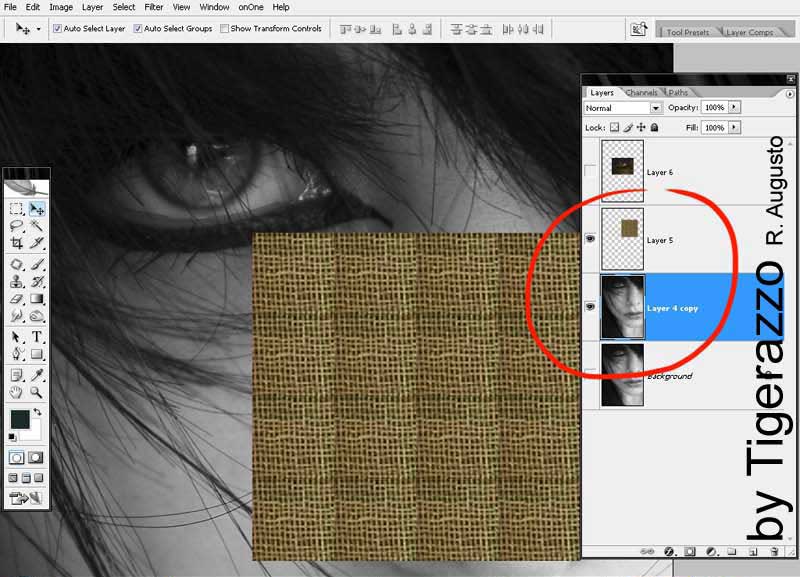
2-To select the layer of the texture. To select Clone Tool, to deactivate alignment and then, "click" to the center of the texture.
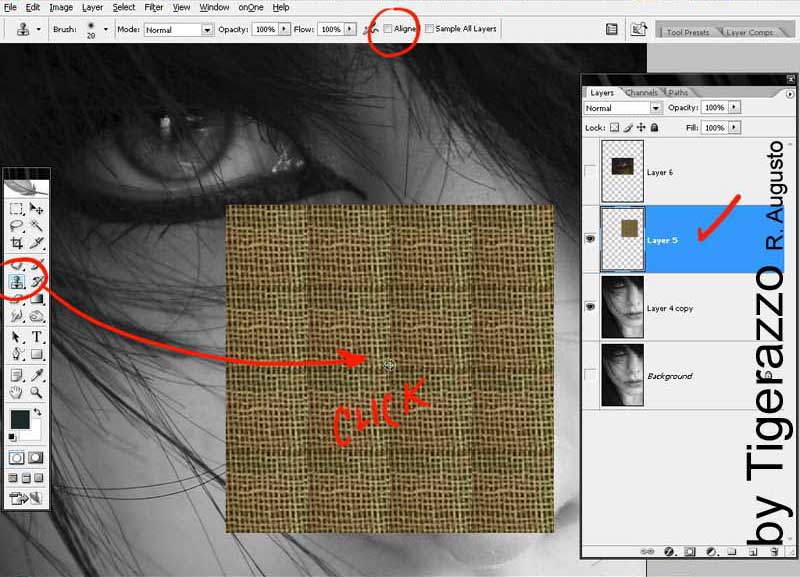
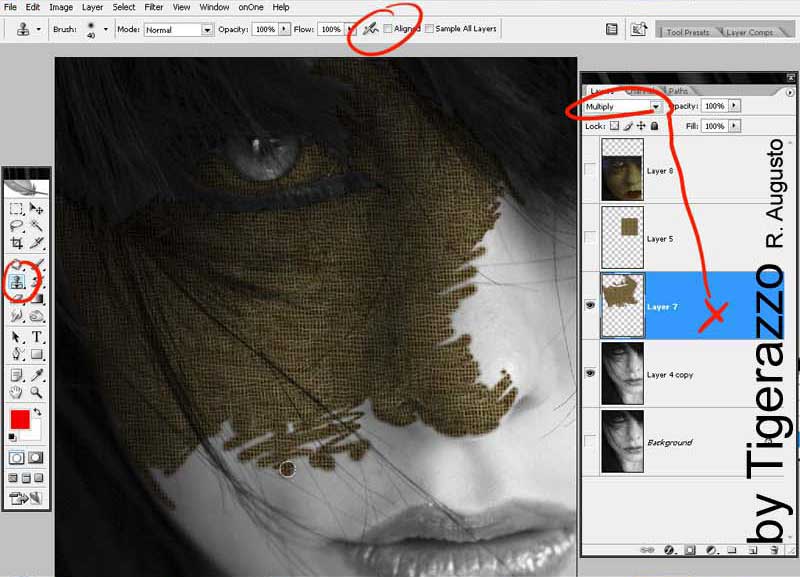
3-Now, we created a new layer, with the option multiply and to begin to clone (pay attention that align option is deactivated, above)

4-It must be more or less as indicate the image, pay attention no activate aligne option, up there (that option will be desactivate for the rest of the tutorial)
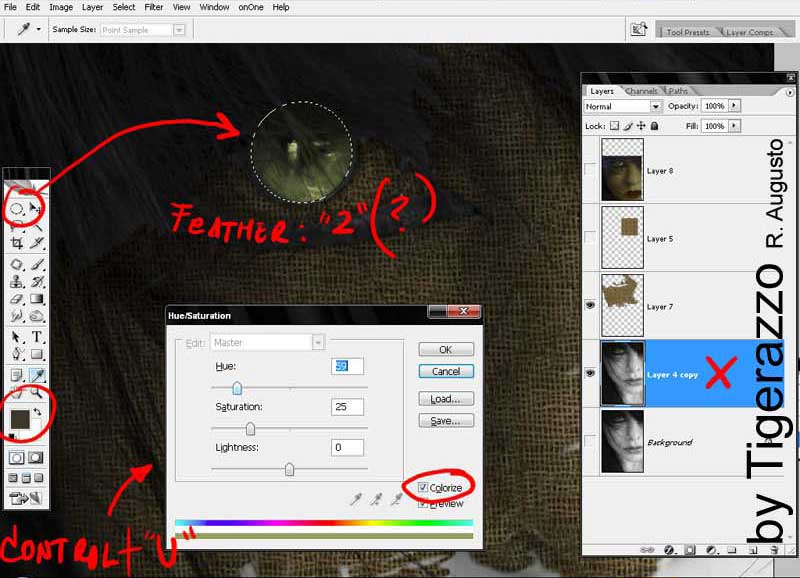
5-To make a "Circulate" selection with a little feather on the indicated layer and changing the color: pay attention the color selected; you can change it to obtain other results.
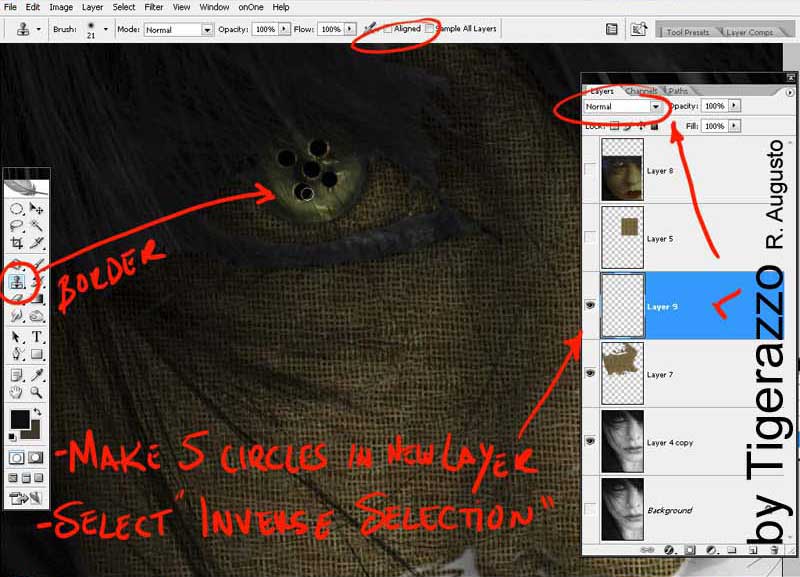
6-To create a new layer, to make 5 circles on the eye (they will be the holes of the future button), soon to select them and to revert the selection. Next, with the Clone Tool you can do it like the example, by the edge (the selection is hidden 'cause you can see the result)
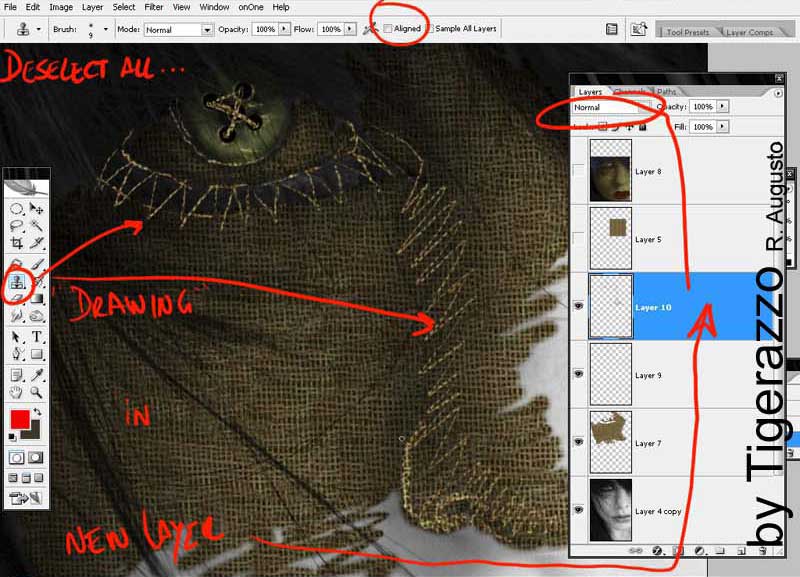
7-Deselect everything! ... To create new layer (in normal mode) and to continue cloning, same to the example: to create threads of the rag around the eye and the nose.
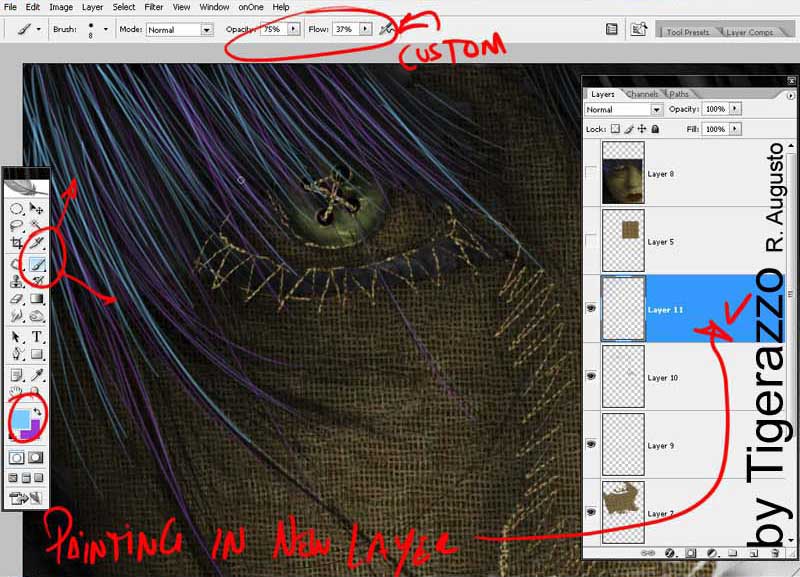
8-To create new layer (normal mode); now we will paint with "brush tool", the hairs of different colors. Change the opacity.
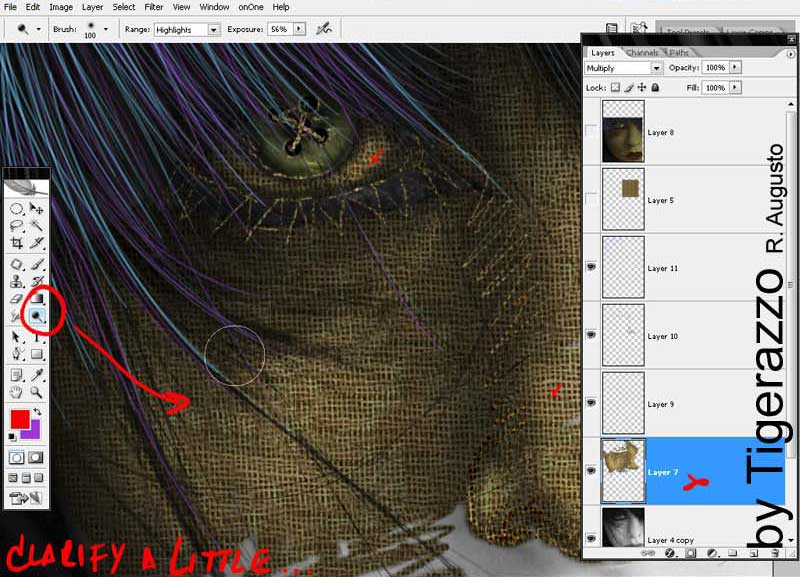
9-Now, to select thread layer and choose something of darkness (shade) in the indicated points. Pay attention exposure" option, above (change it if you like)
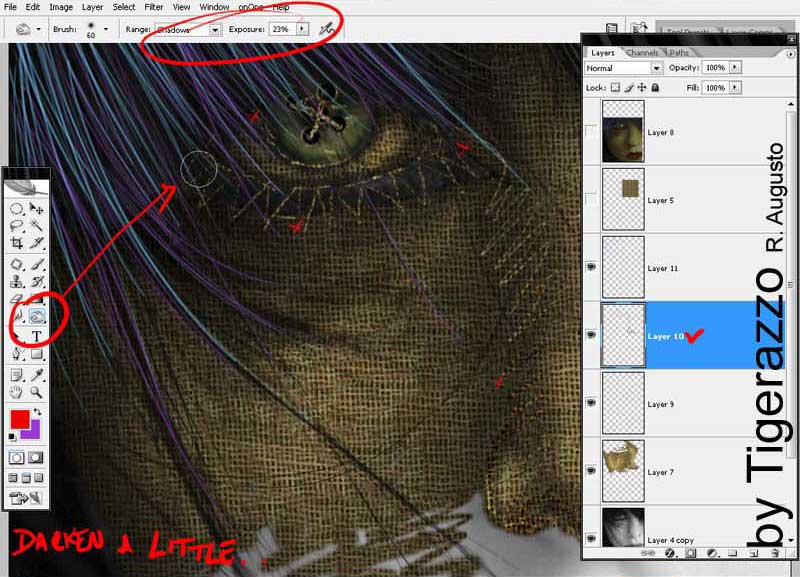
10-It's Done!!!.... Now, we chose the layer of the skin and we applied it something of light in the points, indicated with red.
I hope has been very clear the explanation. For the mouth and others it is the same.... Greetings


Comentarios de Rag Skin using Adobe Photoshop | Only Photoshop
↑ Tutorial